Four years of being vegan
Happy veganniversary to me! Today celebrates the four year anniversary of me being vegan. I can honestly say that becoming vegan has changed my life significantly for the better and is without a doubt one of the more life altering decisions I’ve made. Though making the switch from being a vegetarian to vegan wasn’t that dramatic in and of itself, the resulting changes in my lifestyle have come to shape who I am. I find so much joy in experimenting in the kitchen and there are few things that calm me more than baking. I have made so many awesome friends in the vegan community through this little blog that really just started out as something to motivate myself.
In the past four years I’ve learned to be proud of my choice to be vegan as the more I learn, the more it is reinforced in my mind that it is undoubtedly the best option. Whereas I used to shy away from conversations with non-vegans on the issue, I’m now happy to point out many of the benefits of veganism and even happier to tell people about all the really amazing vegan food and restaurants out there.
Every day I try to be a better vegan. This means not only trying to eat a diverse diet (it is even easier now than ever to get vegan junk food) but also being conscious of my choices outside of what I eat. I do the best I can without driving myself crazy. In a world where nearly everything is processed and manufactured it’s not always possible to know every element of the production of an item, but I try my best to be aware.
I’m so glad that I get to be a vegan blogger, a vegan baker, a vegan filmmaker, a vegan cyclist. I’m so happy that I’ve met so many of you and learned so much from your vegan adventures. So I insist, celebrate with me and go eat something damn delicious, because nothing tastes better than being vegan.
Graham crackers revisited
Not the type to let a kitchen mishap get me down, I had to try my hand again at graham crackers. I scoured the web for tips and info but settled with two of the highest ranking of recipes, one vegan and one not. There were elements of each that I liked but neither seemed to be exactly what I was looking for. What I came up with was a strange amalgamation of the two, with a hint of my own laziness thrown in there.
Surprisingly, they came out really well. They’re a little more cookie-like than store bought grahams but in the best of ways. The molasses in the sugar gives them a rich flavor that pairs perfectly with the cinnamon. They have a great crispy crunch but aren’t hard. Though the whole thing was a bit intimidating, it was well worth it.
Vegan Graham Crackers
2 1/2 cup graham flour
2 Tbsp all purpose flour
1/2 tsp baking powder
1/2 tsp baking soda
3/4 tsp sea salt
1 cup dark brown sugar
1/2 tsp cinnamon
3 1/2 Tbsp Earth Balance chopped into small cubes and frozen
1/4 cup soy milk
1/4 cup agave or simple syrup
2 Tbsp vanilla extract
1. Chop your Earth Balance and put it in the freezer. It is easiest to use the Earth Balance sticks.

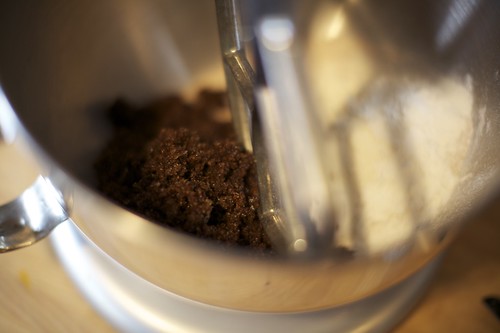
2. I did not have dark brown sugar so I just took 1 cup of regular sugar and added 2 Tbsp of molasses and combined thoroughly with a fork.

3. Mix the sugar, flours, salt, baking soda, baking powder and cinnamon in a mixer on low. You could also do this by hand. Mix until just combined.

4. Next add the frozen Earth Balance. Mix the ingredients until it starts to resemble a coarse meal. It is ok if the Earth Balance is not 100% incorporated. It is more important to not over-mix.
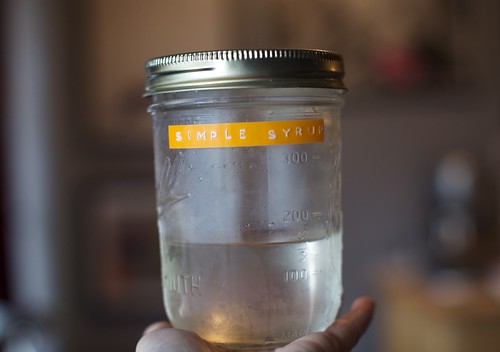
5. Mix the soy milk, agave and vanilla in a separate bowl. I used a mixture of agave maple syrup and simple syrup (sugar water) because that’s what I had in the fridge. Mix into the flour mixture until you have a rough dough.

6. Shape the dough roughly into a rectangle and wrap in plastic wrap. Refrigerate for at least 2 hours.
7. Preheat the oven to 325°
8. Remove the chilled dough and cut in half. Put the remaining portion back into the fridge. The dough will be very sticky so flour generously. I recommend rolling it out between two pieces of parchment paper. You will still have to flour it though. Roll out to approximately 1/4″ thickness. Using a pizza cutter or similar tool, cut into even(ish) squares. Poke holes in the tops with a fork or skewer and sprinkle with sugar and cinnamon. Repeat with the second batch of dough.
9. Here is where you should chill your dough for an additional 20-30 minutes. I didn’t. I got impatient. I’m sure it would be better if you did, but it didn’t make a huge difference. My graham crackers spread out a bit more and had to be recut after baking.
10. Bake for 20-25 minutes, rotating the tray about 15 minutes in.
11. Remove and let cool. Eat till your hearts content.
Mushroom & garlic tofu ravioli
It’s official. Making ravioli makes me feel like a real cook. A chef even! I’ve made pies and crepes and hundreds of cupcakes, but this did it. Ok, so I did make one mistake in the process which made the end result not as pretty as I would have liked, but they still tasted amazing.
I started out using this homemade pasta recipe. I got a little excited at the market and got a few different flours so I’m going to try a semolina flour version as well. For the filling, I sauteed some chopped baby bella mushrooms in olive oil and some white wine, with just some salt and pepper and a touch of basil.
I wanted to add some tofu ricotta, but I realized I didn’t have all the necessary ingredients. Then I got a little carried away with the minced garlic (as usual). So it’s more like garlic tofu ricotta. That is not at all a bad thing.
Garlic Tofu Ricotta
7 oz firm tofu (about half a container) drained and crumbled
3 cloves minced garlic
1 Tbsp nutritional yeast
1 tsp tahini
1/2 tsp salt
1 tsp lemon juice
1/2 tsp basil
1/4 tsp onion powder
Put all ingredients in a bowl and combine using a fork.
After rolling out two sheets of the pasta dough, spoon on a little of both the mushrooms and tofu, trying to stay in a grid pattern as much as possible. Cover with the second sheet and seal in the filling with your fingers, starting in the middle as to not make air pockets. Cut each square with a pie cutter or sharp knife.
Cook in a medium pot of boiling water for approximately three minutes, being careful not to split any holes in them. Definitely don’t put them in a bowl before you put them in a pot and let them get all stuck together. Who would do something like that? Definitely not me! I’m a pro! Oh wait….
White Russian Cupcakes
Do I really need to describe these? White Russian in a cupcake. I’m just gonna go ahead and give you the recipe. Beware this frosting is deadly.
White Russian Cupcakes
Kahlua batter
½ cup soy milk
½ tsp white vinegar
1 ¼ cup flour
1 Tbsp corn starch
¼ tsp baking soda
¼ tsp baking powder
¼ tsp salt
¼ cup plus 1 Tbsp sugar
3 Tbsp oil
½ tsp vanilla
1 tsp coffee extract
2 Tbsp Kahlua
1 tsp vodka
Cream batter
½ cup soy milk
½ tsp white vinegar
1 cup + 2 Tbsp flour
¼ tsp baking soda
¼ tsp baking powder
¼ tsp salt
¼ cup plus 2 Tbsp sugar
4 Tbsp oil
1 tsp vanilla
1 tsp vodka
White Russian Frosting
1/4 cup Earth Balance
2 Tbsp Kahlua
2 tsp vodka
1 – 1/2 cup powdered sugar
Preheat the oven to 350°. Fill cupcake tray with liners.
The trick with this recipe is to make both batters at the same time. That means mix all your wet ingredients and all your dry ingredients for both batches simultaneously and then combine them both together. That means you should be working with four bowls.
Mix soy milk and vinegar and set aside. Combine all the dry ingredients for both batters in two separate bowls. In two more bowls, combine all wet ingredients adding the soy milk mixture last. Mix the wet and dry for the Kahlua batter until there aren’t an noticeable lumps. Divide between the 12 cups. Then mix wet and dry for the creme mixture and fill the cups the remaining 3/4 full.
Bake for 20 minutes or until a toothpick inserted comes out clean. Let cool on a rack completely.
For the frosting, beat the Earth Balance until smooth. Add the Kahlua and vodka and beat until fully combined. Add 1 cup of powdered sugar and beat until smooth again. Add more powdered sugar as necessary. A note on this, I used the soy free Earth Balance which is not as dense as the regular stuff so I used 1 1/2 cup powdered sugar, I imagine only 1 cup will be needed though normally. Also, double the recipe if you want to pipe the frosting.
Eat these suckers (but don’t eat too many)!
Veganmofo day 4:Spaghetti Squash Sunday
So, I’ve never had spaghetti squash before. It is one strange vegetable. A squash that peels apart into strands of spaghetti. Imagine that. This fall I thought I’d try my hand at one. They seemed fairly simple to prepare, just cut open lengthwise, poke a few holes in it and bake, cut side down for 45 minutes to an hour at 375°. No one mentions how hard it is to cut these things in half. Not easy at all. With a little bit of difficulty though, I finally managed.
I also put about 1/4 inch of water in the bottom of the baking sheet to help soften it. When it is done, you should be able to insert a sharp knife into the outside easily. Remove from the oven and let cool enough so that it can be handled. Scoop out seeds with a spoon and discard. Then comes the fun part.
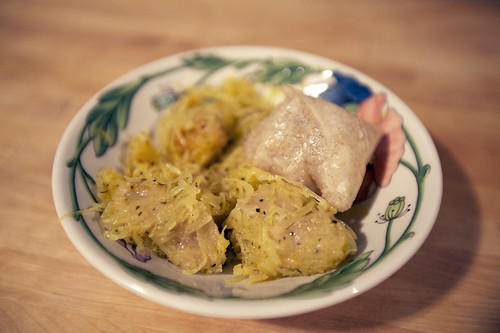
 Using a fork, scrape down the flesh of the squash lengthwise. It will come out easily in strands. I then sauteed the squash in some Earth Balance with minced garlic, basil, salt, pepper and chervil. Though it may seem like you have a great deal of squash, it cooks down significantly.
I wanted to add something else into the mix so I also added some baked mochi. I had bought a package of brown rice mochi at the store thinking it was a very different thing than what I got. The mochi, when baked, puffs up kind of like a pastry, but has a sort of gelatinous explosion from it’s center. It’s very strange. I threw my strange mochi puffs in with the squash as it browned in the pan.
The bizarre combination actually tasted delicious. The mochi had a very light flavor and gave some volume to the dish, making it more filling without complicating it. The squash is rich and autumnal. It isn’t as dense as other squashes but still has the same texture. I’m still intrigued and want to try some more recipes with it; perhaps a casserole.


