gingerbread houses and people
 It’s almost time for winter vacation! Having finished all my holiday gifts and shopping already, we found ourselves with a spectacularly unplanned weekend. We invited some friends over for gingerbread decorating and a little bit of celebrating the winter solstice.
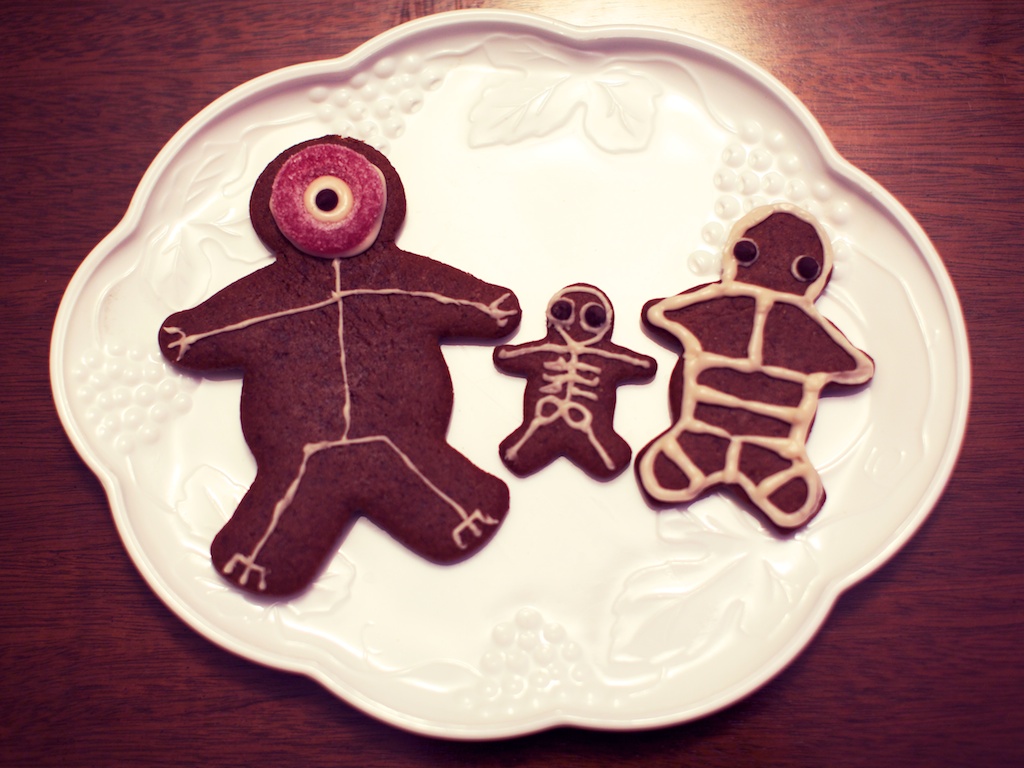 I’m always a fan of cookie making, especially in the cold winter months. (Perhaps it’s time I revisited some of my cookie recipes from years past.) For these gingerbread people I used the recipe from Vegan Cookies Invade Your Cookie Jar
. Shawn made some awesome monster gingerbread people. There were also some more unsavory characters.
 It was my first time constructing a gingerbread house and it was a little lopsided. I spent awhile holding the roof on only to find it slowly sliding moments later. I still think it’s pretty cute though. Maybe next year I’ll try something a little more elaborate. I used a pattern from this recipe book.
 It was a fun evening as we decorated and ate lots of candy and talked late into the night. The days will be getting longer now as we slowly march towards spring again. Another year is almost over.
equinox cookies
 The Autumnal Equinox has arrived and right on cue the temperatures have dropped to a reasonable level. To celebrate being able to turn on the oven without turning the entire apartment into a sauna, I made a batch of fall sugar cookies with maple icing.
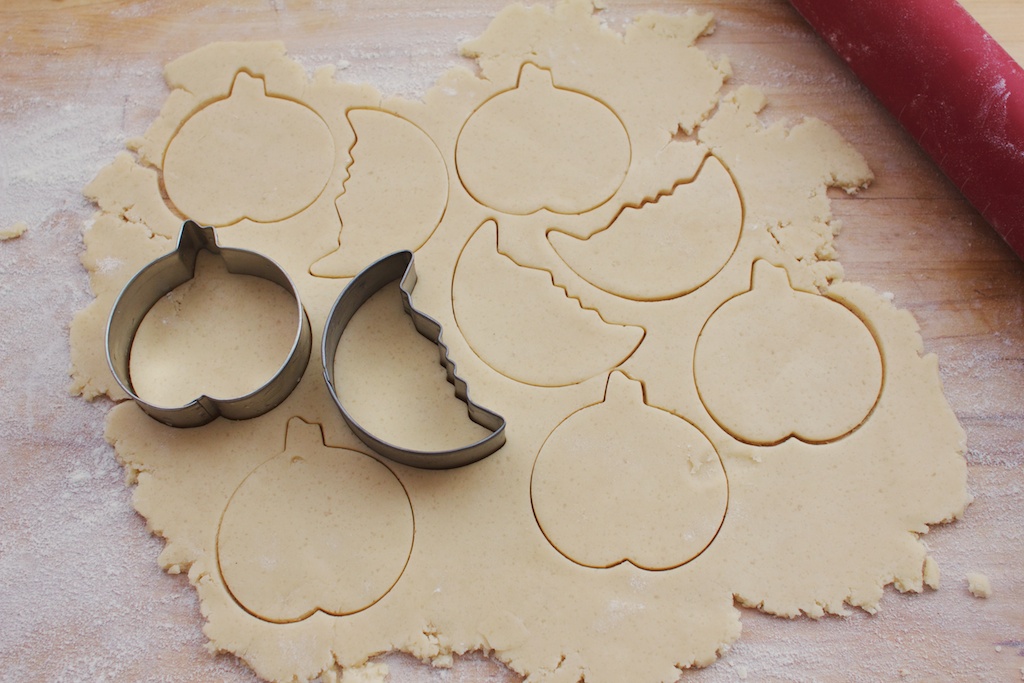
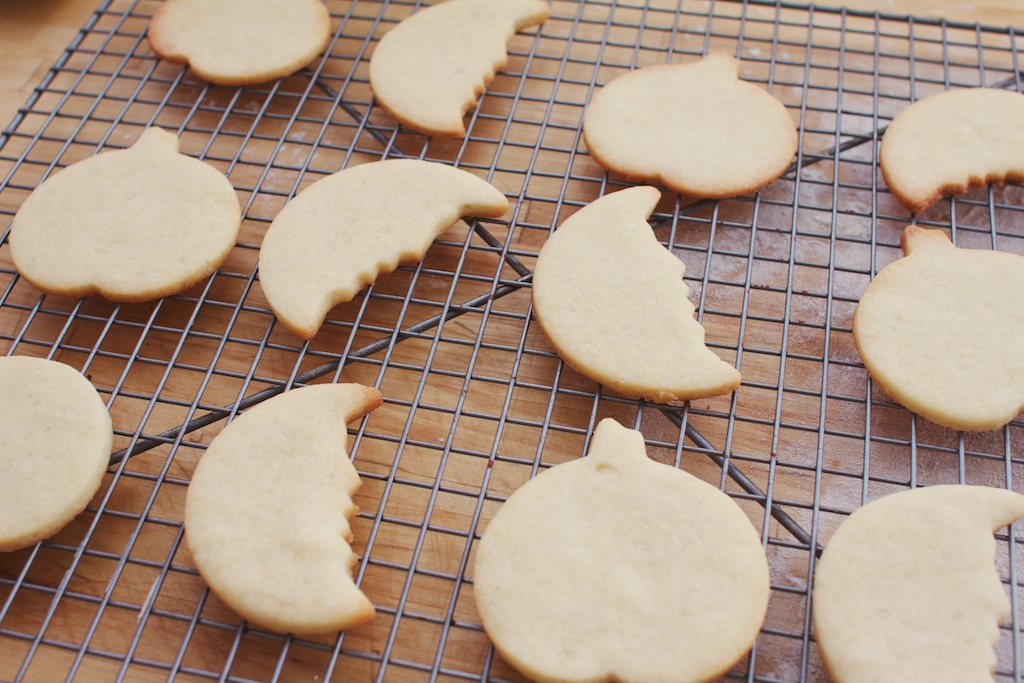 Sugar cookies are easy if you remember to make the dough in advance. I mixed these up yesterday and then spent the entire evening wishing it was time to bake them. I’m happy to say I still have half the dough waiting in the fridge for later in the week since I’ve already eaten about a third of the batch I baked this morning. I used the recipe from Vegan Cookies Invade Your Cookie Jar
 which is one of the simpler vegan sugar cookie recipes out there.
The maple icing is just a tad maplely; just a hint for the beginning of fall. It hardens just enough to have a glossy sheen without being crunchy. Here is the recipe:
Maple Icing
1 1/2 tsp egg replacer
2 Tbsp water
2 Tbsp maple syrup
1 1/2 cup sifted powdered sugar
1 drop orange food coloring (optional)
With a hand mixer, whip the water and egg replacer until frothy. Add in maple syrup and continue to whip for a bit longer. Sift in the powdered sugar an mix until combined. Add in food coloring if desired. Use right away or cover with a damp cloth.
With fall’s arrival I’m looking forward to more baked goods and more fall crafting as it is the perfect time to cozy up with a classic movie and work on knitting and quilting projects. I still haven’t come up with any Halloween costume ideas that have stood out. I’ll have to keep brainstorming. What are you excited for this fall?
ice cream snowballs

One of the people I’m saddest I never was able to meet is Shawn’s mother, Sharon. She passed away a few years before Shawn and I met, and though I was never able to know her, I feel that she still has an impact on our life together. Shawn always tells me stories about her and it’s easy to see how much she did for her five children. She was a talented cook and went out of her way to make celebrations special. When Shawn and some of his siblings went vegan, she would adapt her recipes to make vegan versions.
Often times, Shawn will tell me something she used to make and we’ll try to recreate it. These snowballs fall into that category. A simple to assemble treat that is exponentially more tasty because it is fun to eat. With warmer weather rolling around (maybe?) I can see we’ll be making more of these.

Start with a scoop of your favorite non-dairy ice cream.

Roll it around in some coconut. Use your hands. It’s not even that messy.

Place on a cookie sheet and freeze for 10-30 minutes. That’s it! You now have a snowball.

Now personally, I’m not a fan of coconut, but I didn’t want to be left out of the snowball fun, so I made some “dirty snowballs” with crumbled cookies instead.

Perfect.
Thank you Sharon for still being an inspiration, even though we never met. Mostly though, thank you for raising such an amazing son who I adore so much.
Chocolate Peppermint Cookies
 Hello my dears. It’s nearly Christmas and I’m bringing you another cookie recipe for the holiday. This is the most festive of the bunch for sure. While there were a few more in my agenda, I’ve been a bit overwhelmed and unable to make all I set out to. These cookies should totally make up for that though.
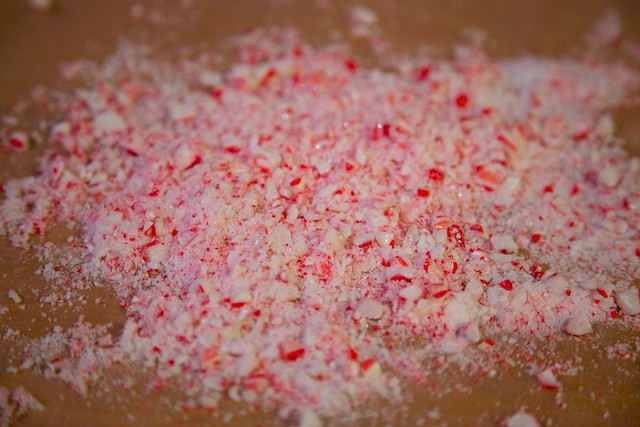
One of the most fun parts of making these is decorating with crushed candy canes. Not only do you get to take your holiday frustration out on some candy canes in pulverizing them (I used a hammer), but they make the cookies look like pink shiny snowy Christmas cookies. I love it.
The cookies are crunchy and rich. The peppermint is refreshing especially paired with the sweet chocolate. The original recipe used white chocolate but I much prefer dark chocolate, so I went with that.
Chocolate Peppermint Cookies
adapted from Martha Stewart, found here
- 1 cup all purpose flour
- 3/8 cup cocoa powder
- 2 tsp instant espresso powder
- 1/2 tsp baking soda
- 1/2 tsp baking powder
- 1/4 tsp salt
- 5 Tbsp Earth Balance
- 3/4 cup sugar
- 2 Tbsp warm water + 1 tsp egg replacer whipped together until frothy
- 3/4 tsp peppermint extract
- 4 crushed candy canes or 15 or so peppermint candies
- 1 lb chopped dark chocolate
In a medium bowl, whisk together the flour, cocoa, espresso, baking soda & powder and salt, then set aside. Using an electric mixer, beat together the Earth Balance and sugar. Gradually add the water and egg replace mixture and continue to beat until well combined. Add in peppermint extract and continue to beat. Add in the flour mixture a little at a time and beat until the dough just comes together. Shape into two disks, wrap in plastic and refrigerate for at least and hour.
Preheat oven to 325° and line two baking sheets with parchment paper. Roll out the dough into until it is 1/8 inch thick. Use a 2″ cookie cutter to cut cookies and transfer to prepared baking sheets. Cool in the freezer for 15 minutes and then bake until crispy, about 12 minutes. Move parchment with cookies on it to a cooling rack and let cool.
Using a double boiler or a bowl set on top of a pot of water, melt your chocolate. Once it is smooth, let sit on stove so that it cools enough to not burn you, but remains soft. Sift your crushed candy canes into a fine powder and separate chunks. Set aside both to decorate. If it is particularly humid, you may have to sift the powdered peppermints again.
Dip the tops of each cookie in your melted chocolate making sure the entire top is covered, but tapping off any excess. I found this was easiest to do with my fingers, but be careful if your chocolate is still hot. It cold easily be done with a fork or tongs (chopsticks?). Sprinkle the crushed peppermint chunks on half and the peppermint powder on the other. Let set in the fridge for at least 3 hours. Best eaten within the next day.
For more holiday cookie ideas, check out the recipes for these Molasses Sandwich Cookies.
Or try your hand at these Mexican Hot Chocolate Cookies.
There are these delicious Oatmeal Cranberry Cookies.
Adorable, sweet Lemon Icebox Cookies.
Or the awesome Espresso Bean Shortbreads.
Happy Baking!
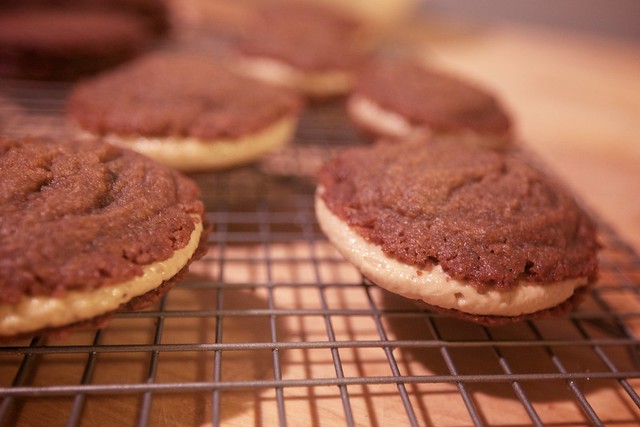
Molasses sandwich cookies
 Let me just start off by saying these cookies are like crack. You have one, and even though they’re so sugary sweet you instantly want another. They’re just insanely delicious. If you want to impress your friends and family with some really easy to make, but seemingly fancy cookies, make these.
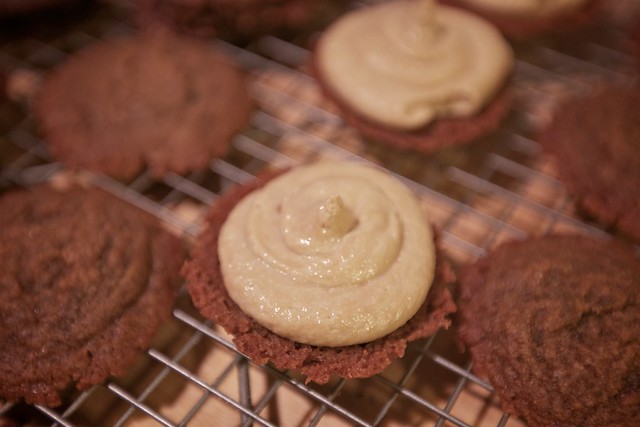
They’re chewy and crispy all at once, with a lovely holiday flavor. They would be perfect as dessert but also with a cup of coffee. They’re just so darn good though, you could really eat them anytime, and trust me, you’ll want to.
I had a bit of trouble with my first batch because I misread the recipe entirely. On my second go around, they came out as beautiful as they tasted, no crumbly edges.
Molasses Sandwich Cookies
adapted from Martha Stewart, found here
- 1 1/2 cup flour
- 1/2 tsp baking soda
- 1 tsp ground cinnamon
- 1/2 tsp salt
- 1 cup packed brown sugar
- 1/2 cup Earth Balance, room temperature
- 1/4 cup molasses (not blackstrap)
- 1/8 cup water
Preheat your oven to 350° and line 2 baking sheets with parchment paper. Whisk together dry ingredients in a medium bowl; flour, baking soda, salt, and cinnamon. In another bowl, cream together the Earth Balance and sugar with an electric mixer. Mix in the molasses until combined. Add the flour and mix until it forms a dough and then add in the water.
Using a tablespoon, scoop balls of dough onto your prepared baking sheet, giving each about an inch and a half between cookies. Bake for 12 – 15 minutes, until the center is firm.
Let cool on the baking sheet for 5 minutes. Transfer to a cooling rack to let cool completely. Prepare the filling.
Molasses filling
- 12 Tbsp Earth Balance, room temperature
- 3 Tbsp molasses
- 2 cups powdered sugar
Beat together the Earth Balance and molasses till smooth. Gradually add in the powdered sugar and beat until slightly fluffy. If you desire a firmer filling, add more powdered sugar.
Using a knife, a spoon, or a pastry bag, spread a bit of the filling on the bottoms of half of your cookies. Press another cookie onto the filling to make each sandwich.