Vegan Brownies
 It all started when Tara inquired with a few vegan ladies about the best way to make vegan brownies. We planned to get together and try out some possibilities. I had all my ingredients packed up and recipes to try.
Then disaster struck. Well, not really disaster. More like a wedding with a vengeance. Ok, not that either. Really just normal wedding stuff. Normal “we haven’t gotten everything sorted and our wedding is in a month from today” craziness. Which turned into me spending the day planning and strategizing (which is pretty much what I do everyday now). Which meant, no brownies for me. Sad face.
Then, the same night of my brownie flakiness (not the delicious flakiness either) I received an email from my mom’s friend in desperate need of vegan brownie help. She had tried to make some herself and despite her best efforts, they had come out oily and burnt. You know you must help someone when they exclaim in an email,
“I’m a bloody vegan brownie killer!!!”
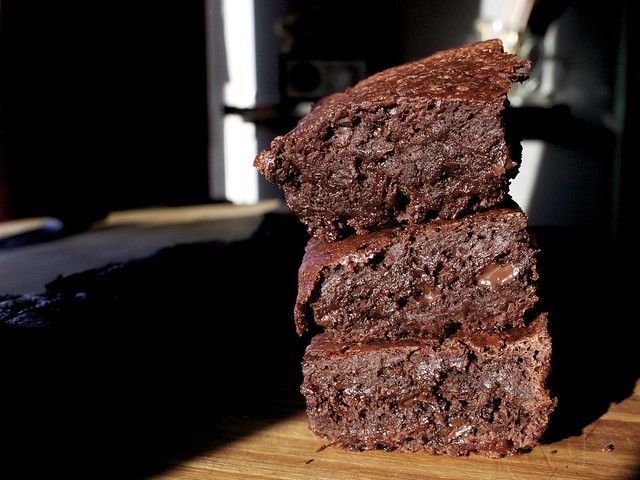
So, since I’m no brownie pro myself, I figured I’d better test the recipe I had before I sent it along. And with no time to be experimental, I turned to The Joy of Vegan Baking. The brownie recipe in this cookbook appealed to me as it included both applesauce and flax, which seems to me the perfect combo for a moist, but not oily brownie.
I have to admit, these brownies were pretty darn good. They definitely leaned towards the gooey fudge side of brownies, which I rather like. I undercooked them a bit, on purpose to make sure they would be soft, and without eggs to worry about it’s not really a big deal. They didn’t quite amount to the perfect brownie though. My biggest complaint being that they weren’t chocolatey enough. I also wished they were a bit more flakey on top while retaining their fudginess.
I think I will be back to the drawing boards with this brownie experiment.
Oh and another thing, in case you hadn’t been poking around here recently…I’m getting married in a month (exactly from today)! So yeah, there might just be a bit more wedding talk than usual. Just thought you guys deserved fair warning!
Creamiest Tomato Soup with cashews
 When the weather gets cold, I love a rich, creamy bowl of soup. Who doesn’t? It’s the best. My favorite is tomato soup, but I have to admit, I’m a little picky about it. I like my tomato soup thick and creamy. It shouldn’t have chunks and it shouldn’t be brothy.
I finally decided to try and make my own tomato soup, it seemed only logical. I was blown away by not only how easy it was to make but how amazingly flavorful it was. Since it is nearly as easy as heating up a can of soup, and about 10 thousand times better, I don’t think I’ll ever go back to eating pre-made soup again.

Creamy tomato soup approved by Shawn Bannon.
The key to making it so rich and creamy was cashews. I considered using some sort of soy creamer but knew it wouldn’t give it the right density or the subtle nuttiness.

I most definitely had seconds (and thirds). It was hearty enough to eat on it’s own, but since I ate it a few nights in a row, we also had some kale and roasted butternut squash to go along with it.
Creamy Tomato Soup
- 1/2 cup cashews
- 1/2 cup vegetable broth
- 2 Tbsp Earth Balance
- 1 small onion, chopped
- 2-4 cloves of garlic, minced
- 1 28 oz can of whole peeled tomatoes
- 1/3 cup nutritional yeast
- salt & pepper to taste
In a food processor, blend together your cashews and vegetable broth until smooth. Pour into a separate container and set aside.
In a medium sauce pan, over medium heat, melt the Earth Balance. Add the onions and saute for about 2-3 minutes. As they begin to become fragrant, add in the garlic and saute until your onions are soft and translucent, stirring as not to burn. Add in your tomatoes, including any liquid in the can. Reduce heat and simmer for 10 minutes.
Remove from heat and let cool for a few minutes before pouring into your food processor. Blend until combined and not chunky. Add in the nutritional yeast and pulse to combine. Add in the cashew mixture and blend until very smooth. Season with salt and pepper to your liking and pulse a few times.
It will be fairly thick, so if you like a less robust soup, add more vegetable broth.
Happy 2011 (and a waffle sandwich)
 My dearest readers, it is almost 2011. Can you believe it? I certainly can’t.
This year has been crazy. It’s been rough at times and some of the best things ever have happened as well.
I really can’t wait for 2011. I can’t wait for our wedding and all the new experiences we will have.
On the last day of the year we celebrated by rearranging our whole apartment. I’m rather happy about it.
And we made waffle sandwiches.

We received a fancy little waffle maker for Christmas. It had to get broken in immediately.

So we had waffles for breakfast. We made the Chelsea Waffles from Vegan Brunch and of course there were more than we could eat so we saved a few for later.
After we were hungry from moving all our furniture, I grilled up some apple field roast sausage and some slabs of tofu. Shawn made an amazing cheezy sauce. We piled it all together and devoured it. Definitely amazing. Delicious and amazing.
Tonight I’m looking forward to celebrating with some dear friends. My resolution this year is to be more magical. I think that’s what my life needs.
Happy New Year!
xoxo
Chocolate Peppermint Cookies
 Hello my dears. It’s nearly Christmas and I’m bringing you another cookie recipe for the holiday. This is the most festive of the bunch for sure. While there were a few more in my agenda, I’ve been a bit overwhelmed and unable to make all I set out to. These cookies should totally make up for that though.
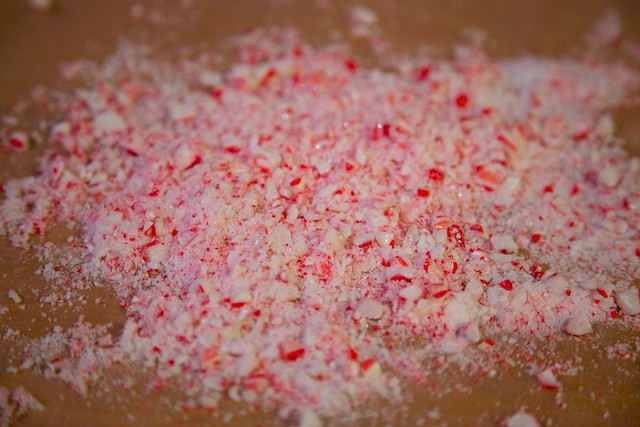
One of the most fun parts of making these is decorating with crushed candy canes. Not only do you get to take your holiday frustration out on some candy canes in pulverizing them (I used a hammer), but they make the cookies look like pink shiny snowy Christmas cookies. I love it.
The cookies are crunchy and rich. The peppermint is refreshing especially paired with the sweet chocolate. The original recipe used white chocolate but I much prefer dark chocolate, so I went with that.
Chocolate Peppermint Cookies
adapted from Martha Stewart, found here
- 1 cup all purpose flour
- 3/8 cup cocoa powder
- 2 tsp instant espresso powder
- 1/2 tsp baking soda
- 1/2 tsp baking powder
- 1/4 tsp salt
- 5 Tbsp Earth Balance
- 3/4 cup sugar
- 2 Tbsp warm water + 1 tsp egg replacer whipped together until frothy
- 3/4 tsp peppermint extract
- 4 crushed candy canes or 15 or so peppermint candies
- 1 lb chopped dark chocolate
In a medium bowl, whisk together the flour, cocoa, espresso, baking soda & powder and salt, then set aside. Using an electric mixer, beat together the Earth Balance and sugar. Gradually add the water and egg replace mixture and continue to beat until well combined. Add in peppermint extract and continue to beat. Add in the flour mixture a little at a time and beat until the dough just comes together. Shape into two disks, wrap in plastic and refrigerate for at least and hour.
Preheat oven to 325° and line two baking sheets with parchment paper. Roll out the dough into until it is 1/8 inch thick. Use a 2″ cookie cutter to cut cookies and transfer to prepared baking sheets. Cool in the freezer for 15 minutes and then bake until crispy, about 12 minutes. Move parchment with cookies on it to a cooling rack and let cool.
Using a double boiler or a bowl set on top of a pot of water, melt your chocolate. Once it is smooth, let sit on stove so that it cools enough to not burn you, but remains soft. Sift your crushed candy canes into a fine powder and separate chunks. Set aside both to decorate. If it is particularly humid, you may have to sift the powdered peppermints again.
Dip the tops of each cookie in your melted chocolate making sure the entire top is covered, but tapping off any excess. I found this was easiest to do with my fingers, but be careful if your chocolate is still hot. It cold easily be done with a fork or tongs (chopsticks?). Sprinkle the crushed peppermint chunks on half and the peppermint powder on the other. Let set in the fridge for at least 3 hours. Best eaten within the next day.
For more holiday cookie ideas, check out the recipes for these Molasses Sandwich Cookies.
Or try your hand at these Mexican Hot Chocolate Cookies.
There are these delicious Oatmeal Cranberry Cookies.
Adorable, sweet Lemon Icebox Cookies.
Or the awesome Espresso Bean Shortbreads.
Happy Baking!
Mexican Hot Chocolate Cookies
 So far in my cookie journey, this batch was the easiest and most fun to make. They were also my least favorite, which isn’t that much of a criticism since I think this week’s other cookies have been amazing. They came out a little doughy and didn’t have the crackly tops I was looking for. They were good, but not perfect. I imagine I’ll be noodling with this recipe to perfect them. It may have just be an issue with my oven temperature, as they were a bit brownie like, which isn’t bad at all, just not what I was looking for in these particular cookies.
On the other hand, after I made these I realized there is a perfectly good recipe in Vegan Cookies Invade Your Cookie Jar that I neglected to check out. In fact, you can see the recipe with a video of the infamous Isa Chandra. So perhaps I’ll just make those instead of trying to fix these. Maybe not though as I like to figure things out for myself sometimes.
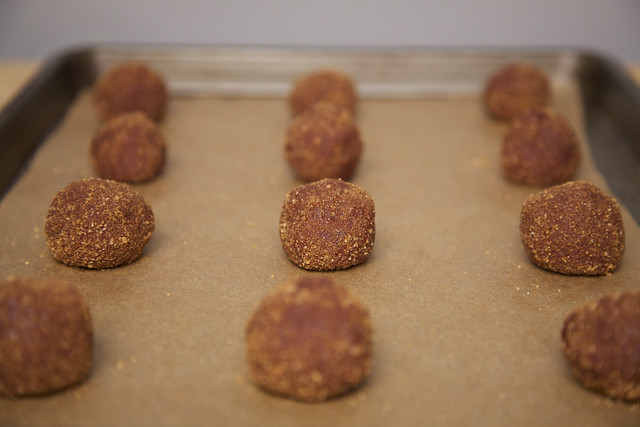
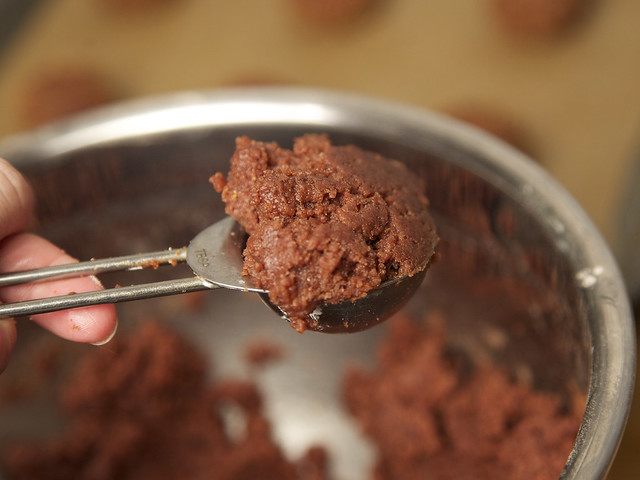
Basically these are like chocolate snickerdoodles with a hint of spice. Which is awesome. The original recipe said to roll them into balls and let cook like that, but I found they came out much better when pressed into disks before hand. You can see my first batch had a lot more height than the second (below).

Please do try these though, perhaps you’ll have better luck than I.
Or you can try some of this weeks other cookie recipes
Mexican Hot Chocolate Cookies
adapted from Martha Stewart, found here
- 2 1/4 cup all purpose flour
- 1/2 cup unsweetened cocoa powder
- 2 tsp cream of tartar
- 1 tsp baking soda
- 1/2 tsp salt
- 1 cup Earth Balance
- 1 3/4 cups sugar, divided
- 1/4 cup water
- 2 tsp cinnamon
- 1/4 – 1/2 tsp chili powder
Preheat oven to 400° and line two baking sheets with parchment paper. Whisk together flour, cooca powder, cream of tartar, baking soda, salt and arrowroot powder. Make sure there are no clumps of cocoa remaining. In another bowl, using and electric mixer, mix the Earth Balance and 1 1/2 cups of sugar until fluffy. Gently mix in the water and then flour mixer until a dough forms.
Combine the remaining 1/4 cup sugar with cinnamon and chili powder in a separate bowl. Roll the dough into golf ball sized balls between your hands. Press each ball until flattened and then coat in the sugar mixture. Place approximately 2 inches apart on you baking sheets. Cook for approximately 10 – 12 minutes, and remove when they begin to crack. Let cool for 5 minutes on the pans and the remove to let cool on a wire rack.